
Lessons
A lesson is one meeting between a teacher and a student at a specific time. You can add lessons one by one, let TutorManager find a free time slot for you, or set up a schedule that repeats every week and generate lessons from it in bulk.
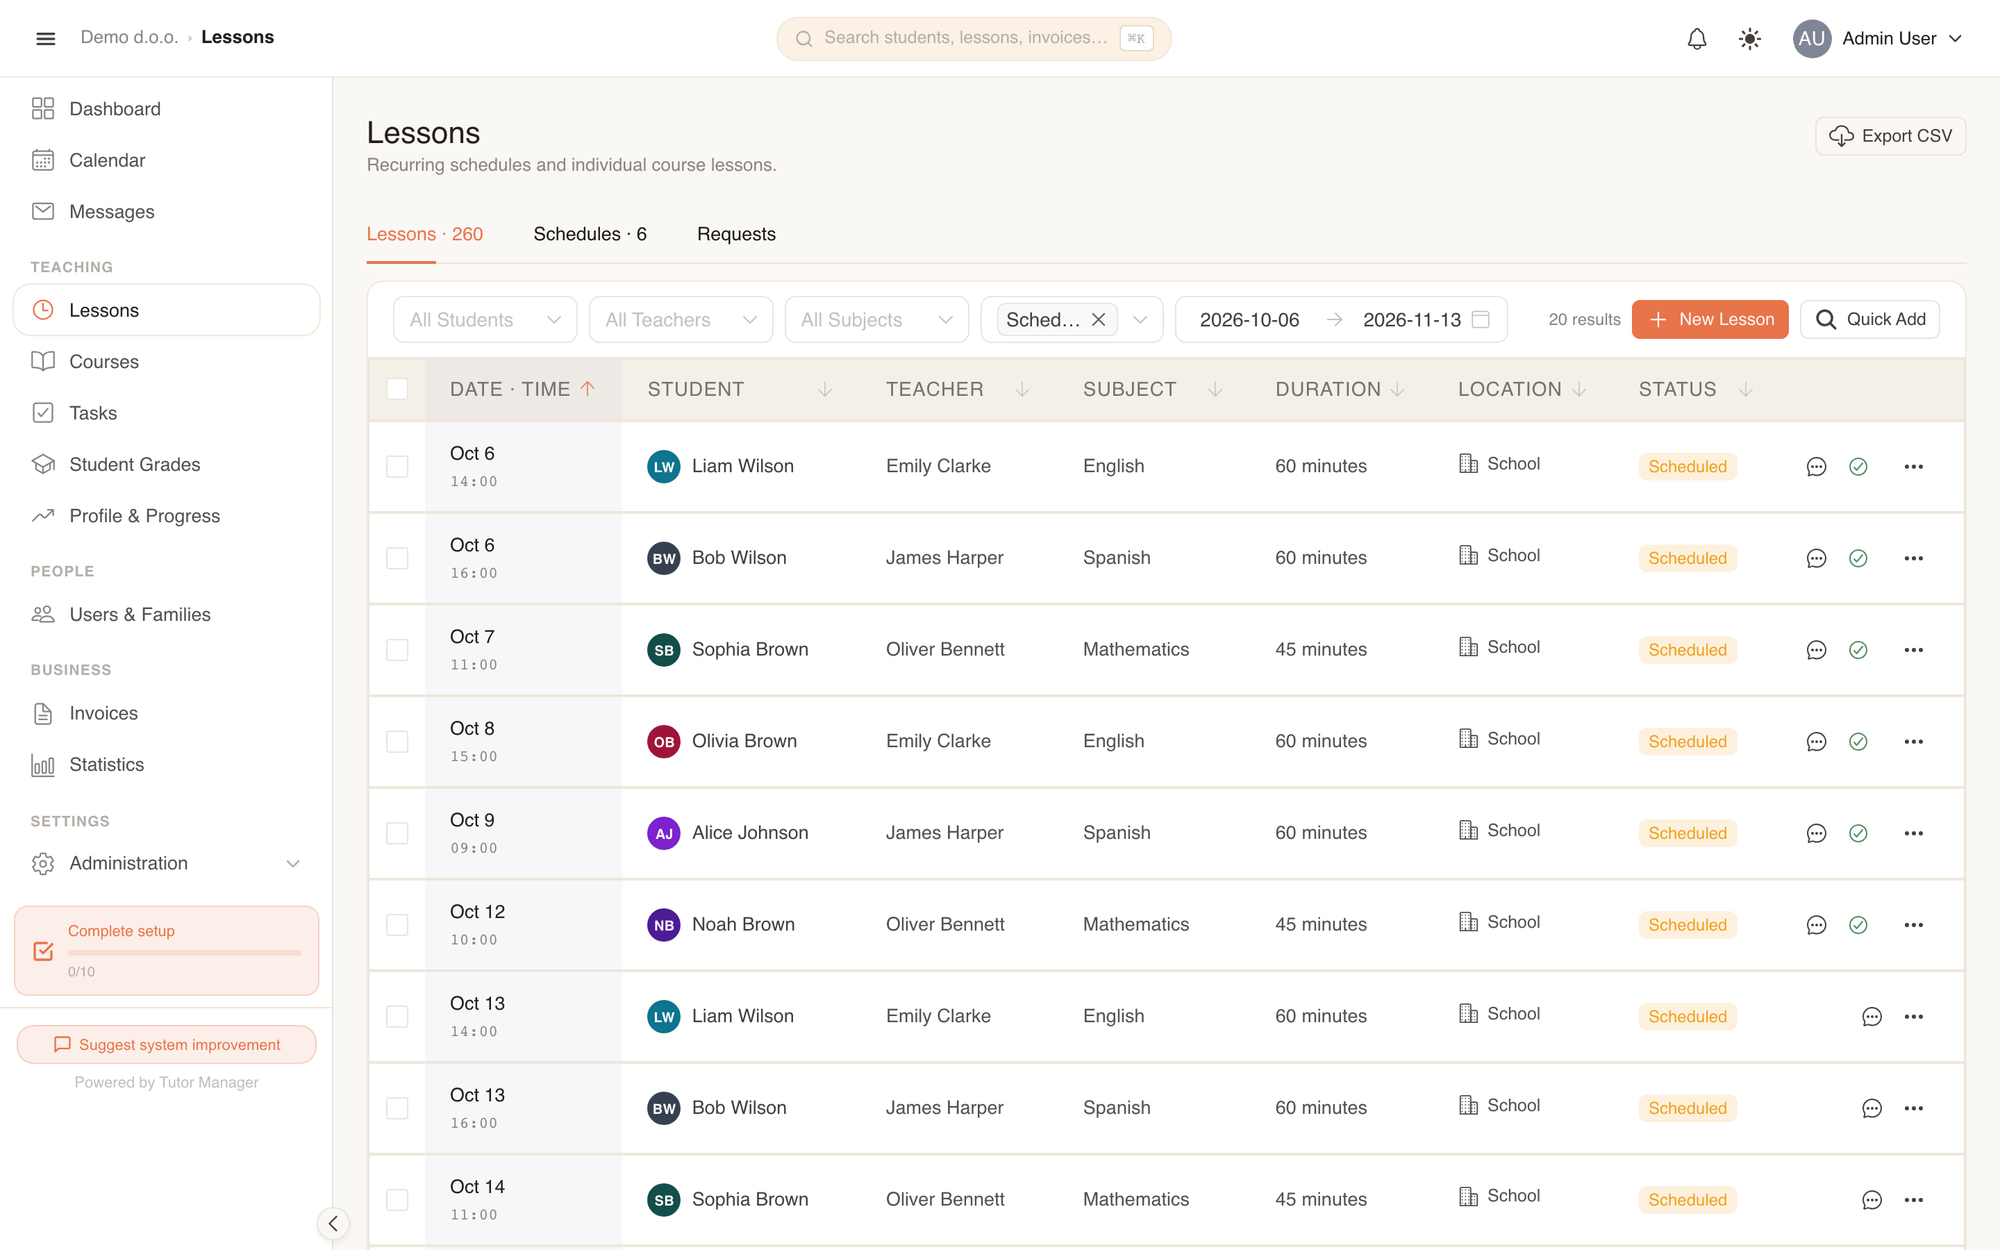
The Lessons page has three tabs:
| Tab | What you find there |
|---|---|
| Lessons | Every individual lesson, with filters by student, teacher, subject, status and date |
| Schedules | Recurring weekly schedules (e.g. "every Tuesday at 16:00") used to generate lessons |
| Requests | Lesson requests sent by students or parents — see Lesson requests |
Group lessons
Lessons for a group of students belong to a course. See Courses.
Add a single lesson
- Open Lessons in the sidebar and click New Lesson.
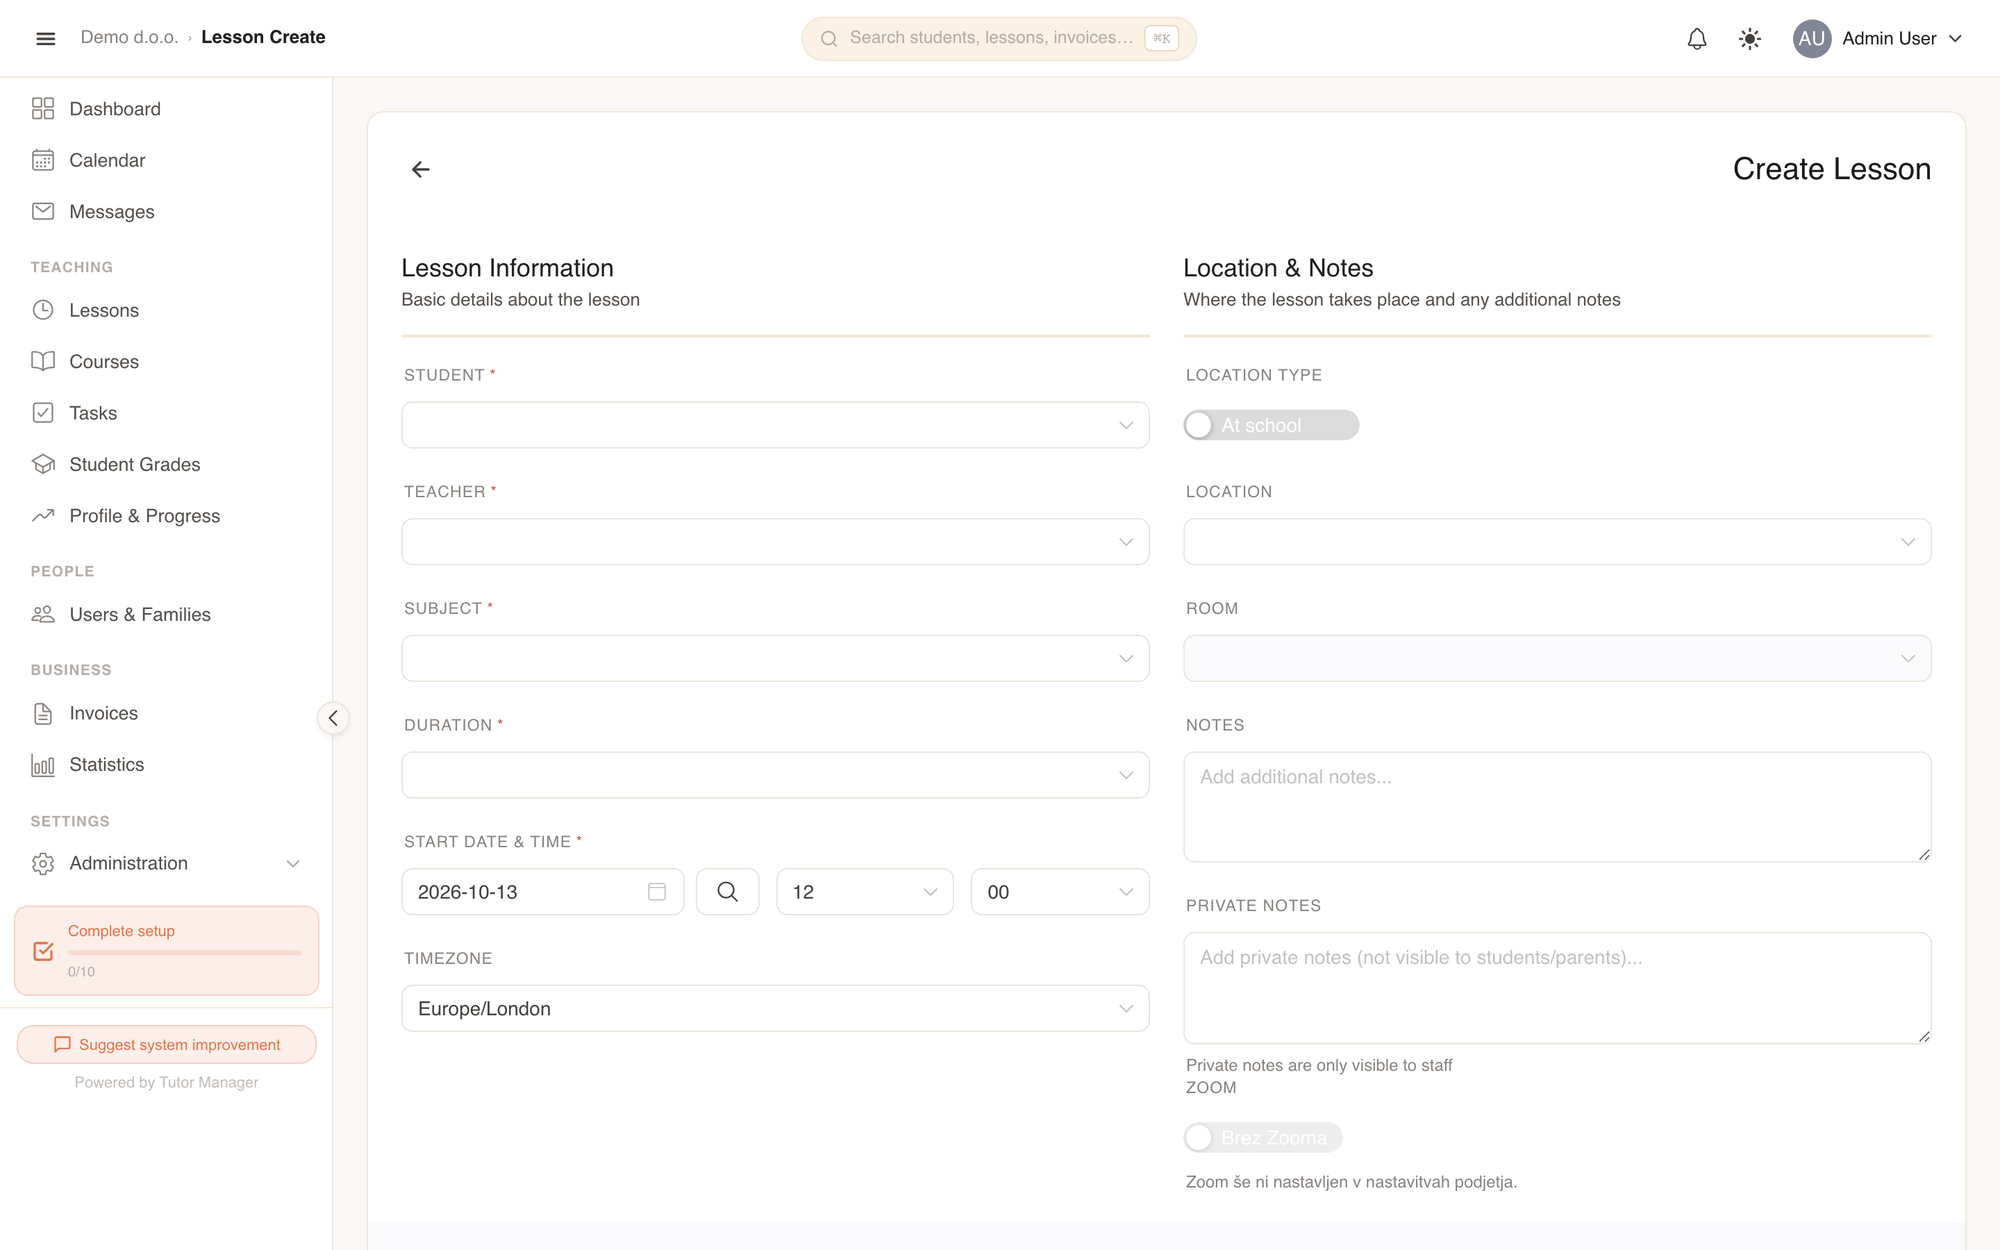
- Under Lesson Information choose the Student, Teacher, Subject and Duration.
- Pick the Start Date & Time. The Calculated End Time is filled in for you.
- Under Location & Notes choose the Location Type: At school (then pick a Location and optionally a Room) or At client home (enter the address and distance).
- Optionally add Notes (visible to the student and parents), Private Notes (staff only) and Files.
- Check the Estimated Price and click Create.
Fields explained
| Field | Meaning |
|---|---|
| Student / Teacher / Subject | Who is taught, by whom, and what. |
| Duration | One of the lesson durations you defined. Together with the subject it determines the price. |
| Location Type | At school — at one of your locations. At client home — at the student's address. |
| Distance (km) | For lessons at the client's home: used to calculate travel costs (mileage). |
| Mileage Discount (%) | Optional discount on the travel costs for this lesson. |
| Notes | Visible to everyone involved in the lesson, including the student and parents. |
| Private Notes | Only visible to staff (admins, receptionists, teachers). |
| Estimated Price | Calculated from your prices and any discounts — this is what will appear on the invoice. |
Conflicts
When the teacher, room or location is already busy at the chosen time, TutorManager shows an Availability Conflict warning with the details (for example "The teacher is busy with Ana (English) at 16:00"). Choose another time, or confirm that you want to add the lesson anyway if you know the other lesson was cancelled.
Find a free time slot (Quick Add)
Not sure when the teacher and room are free? Let TutorManager look for you.
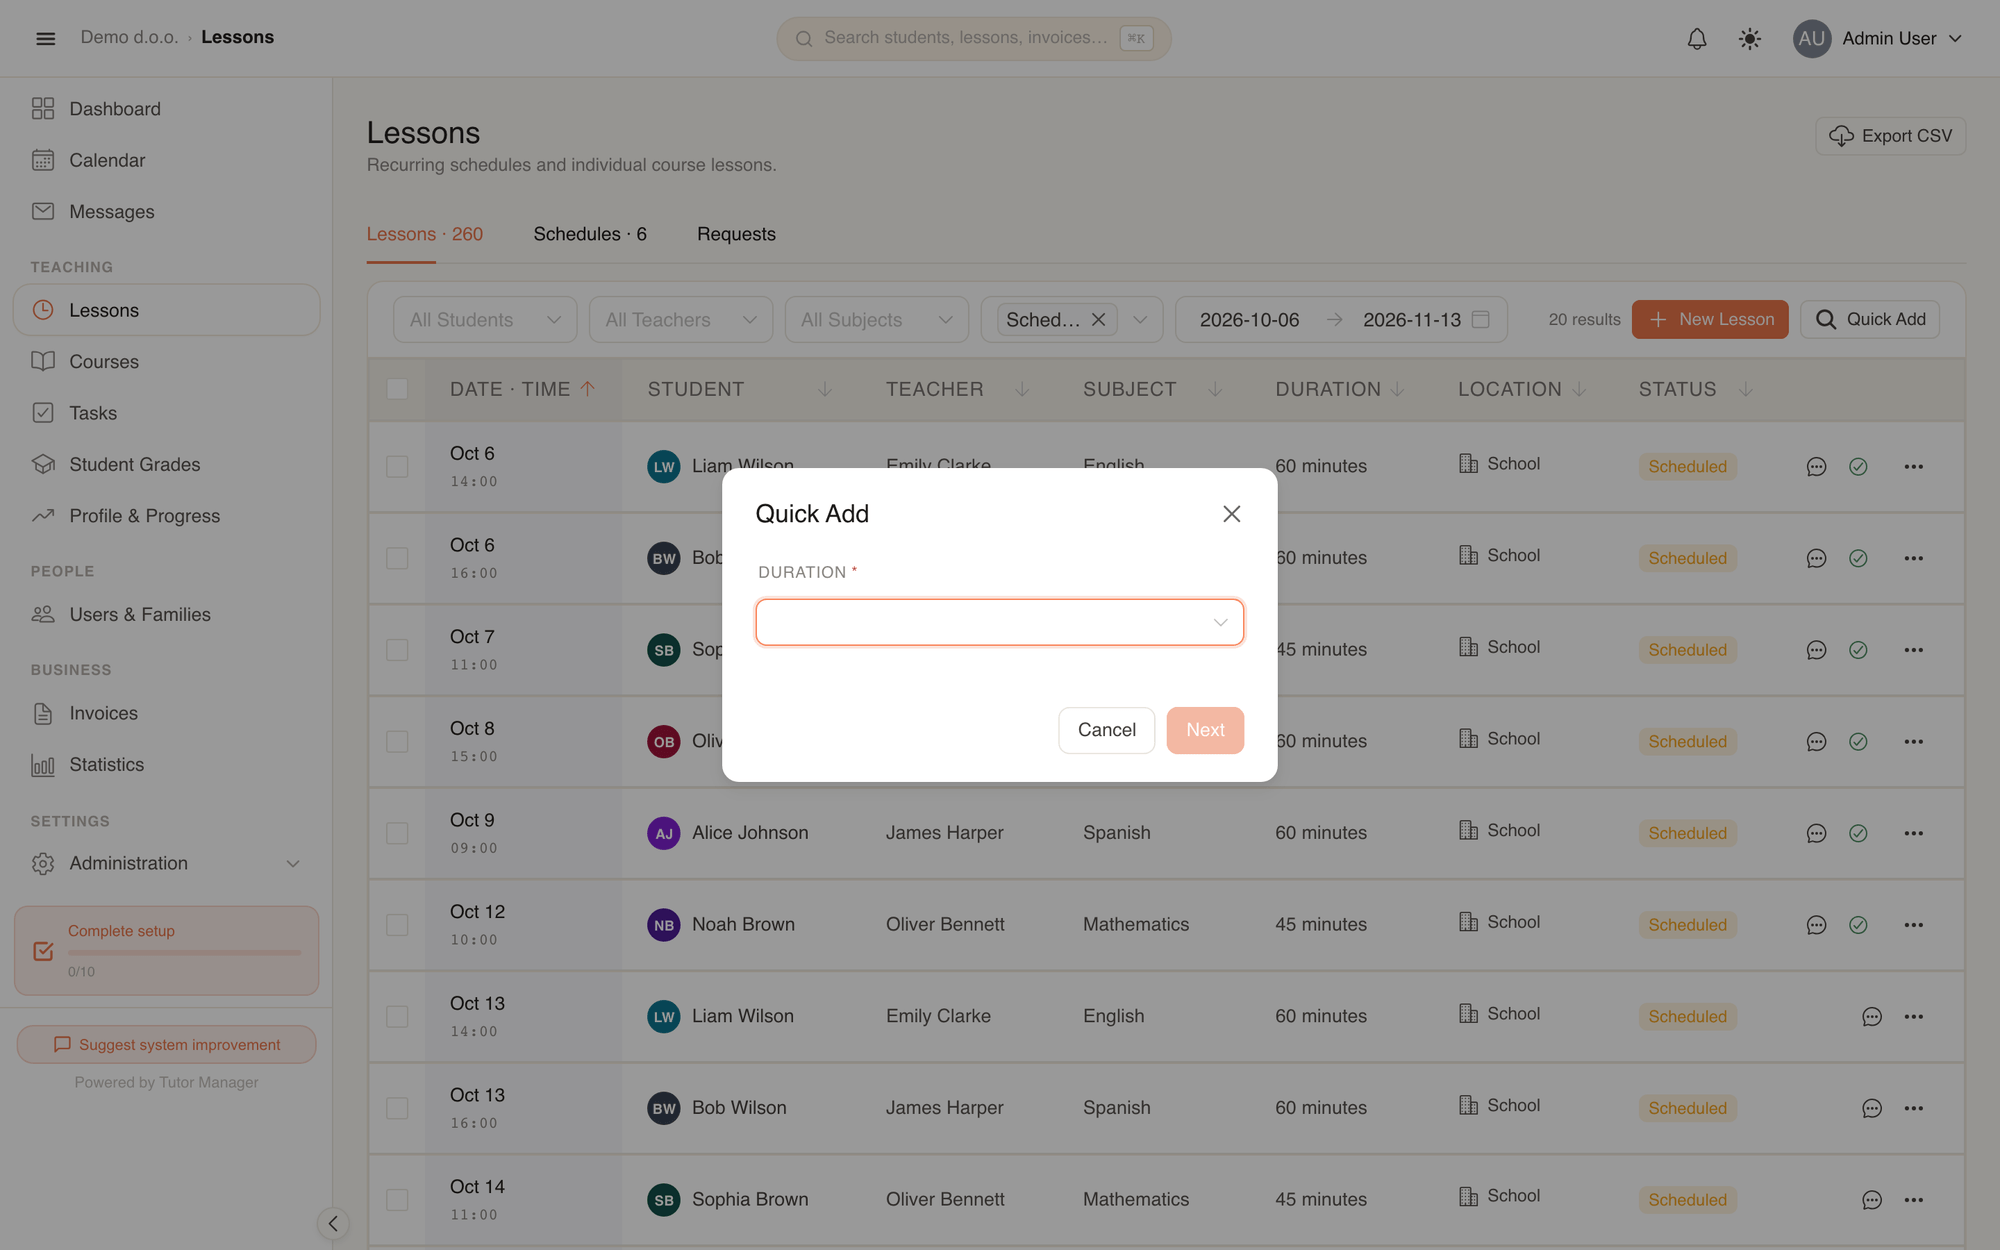
- On the Lessons tab click Quick Add.
- Choose the Duration and click Next.
- TutorManager lists available time slots. Click the one you want.
- The new-lesson form opens with the date and time already filled in — complete the rest and save.
Recurring lessons with schedules
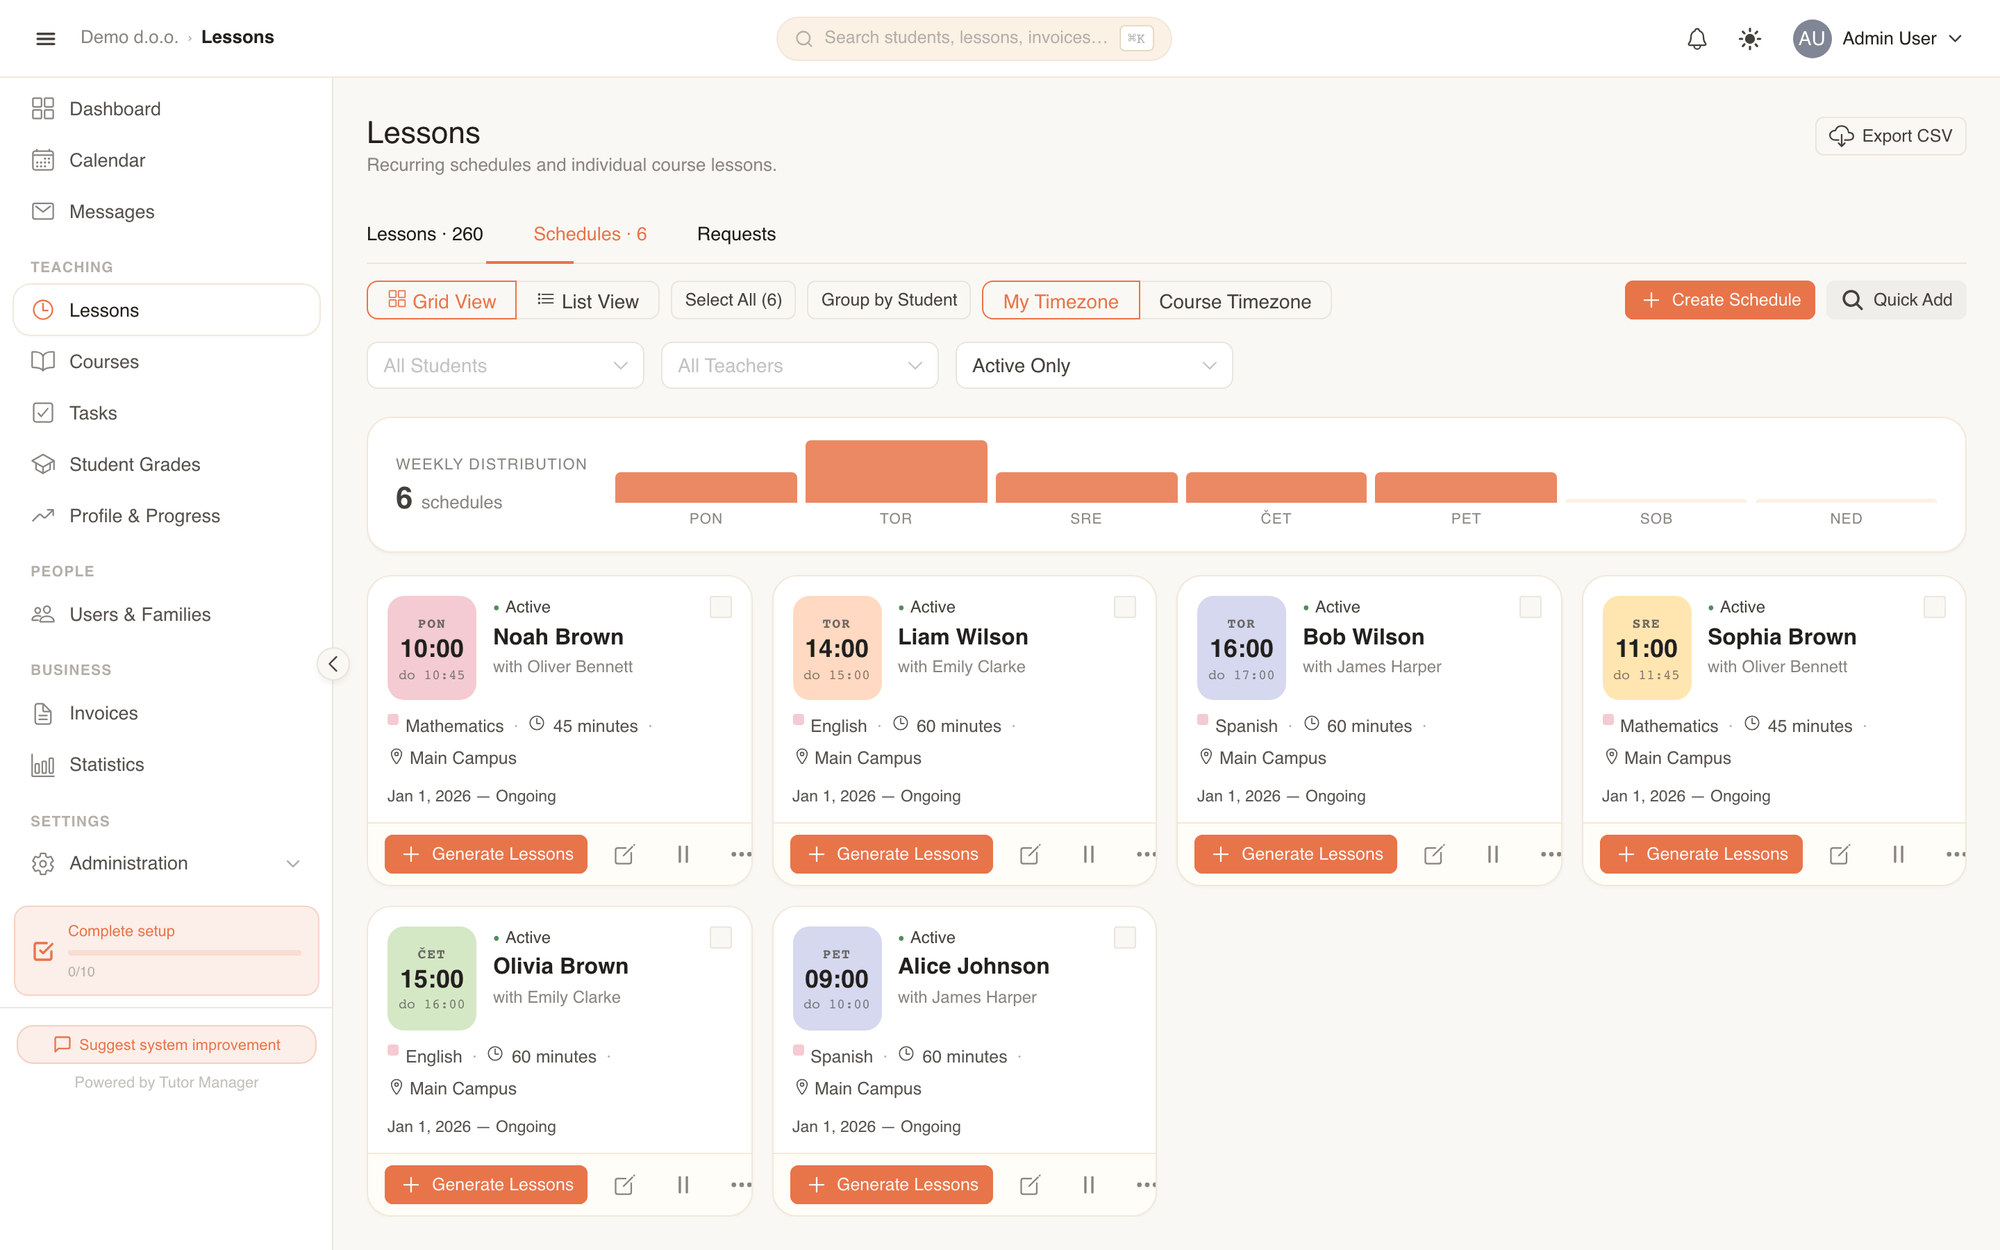
Most students come at the same time every week. Instead of creating each lesson by hand, create a schedule once and generate the lessons from it.
Create a schedule
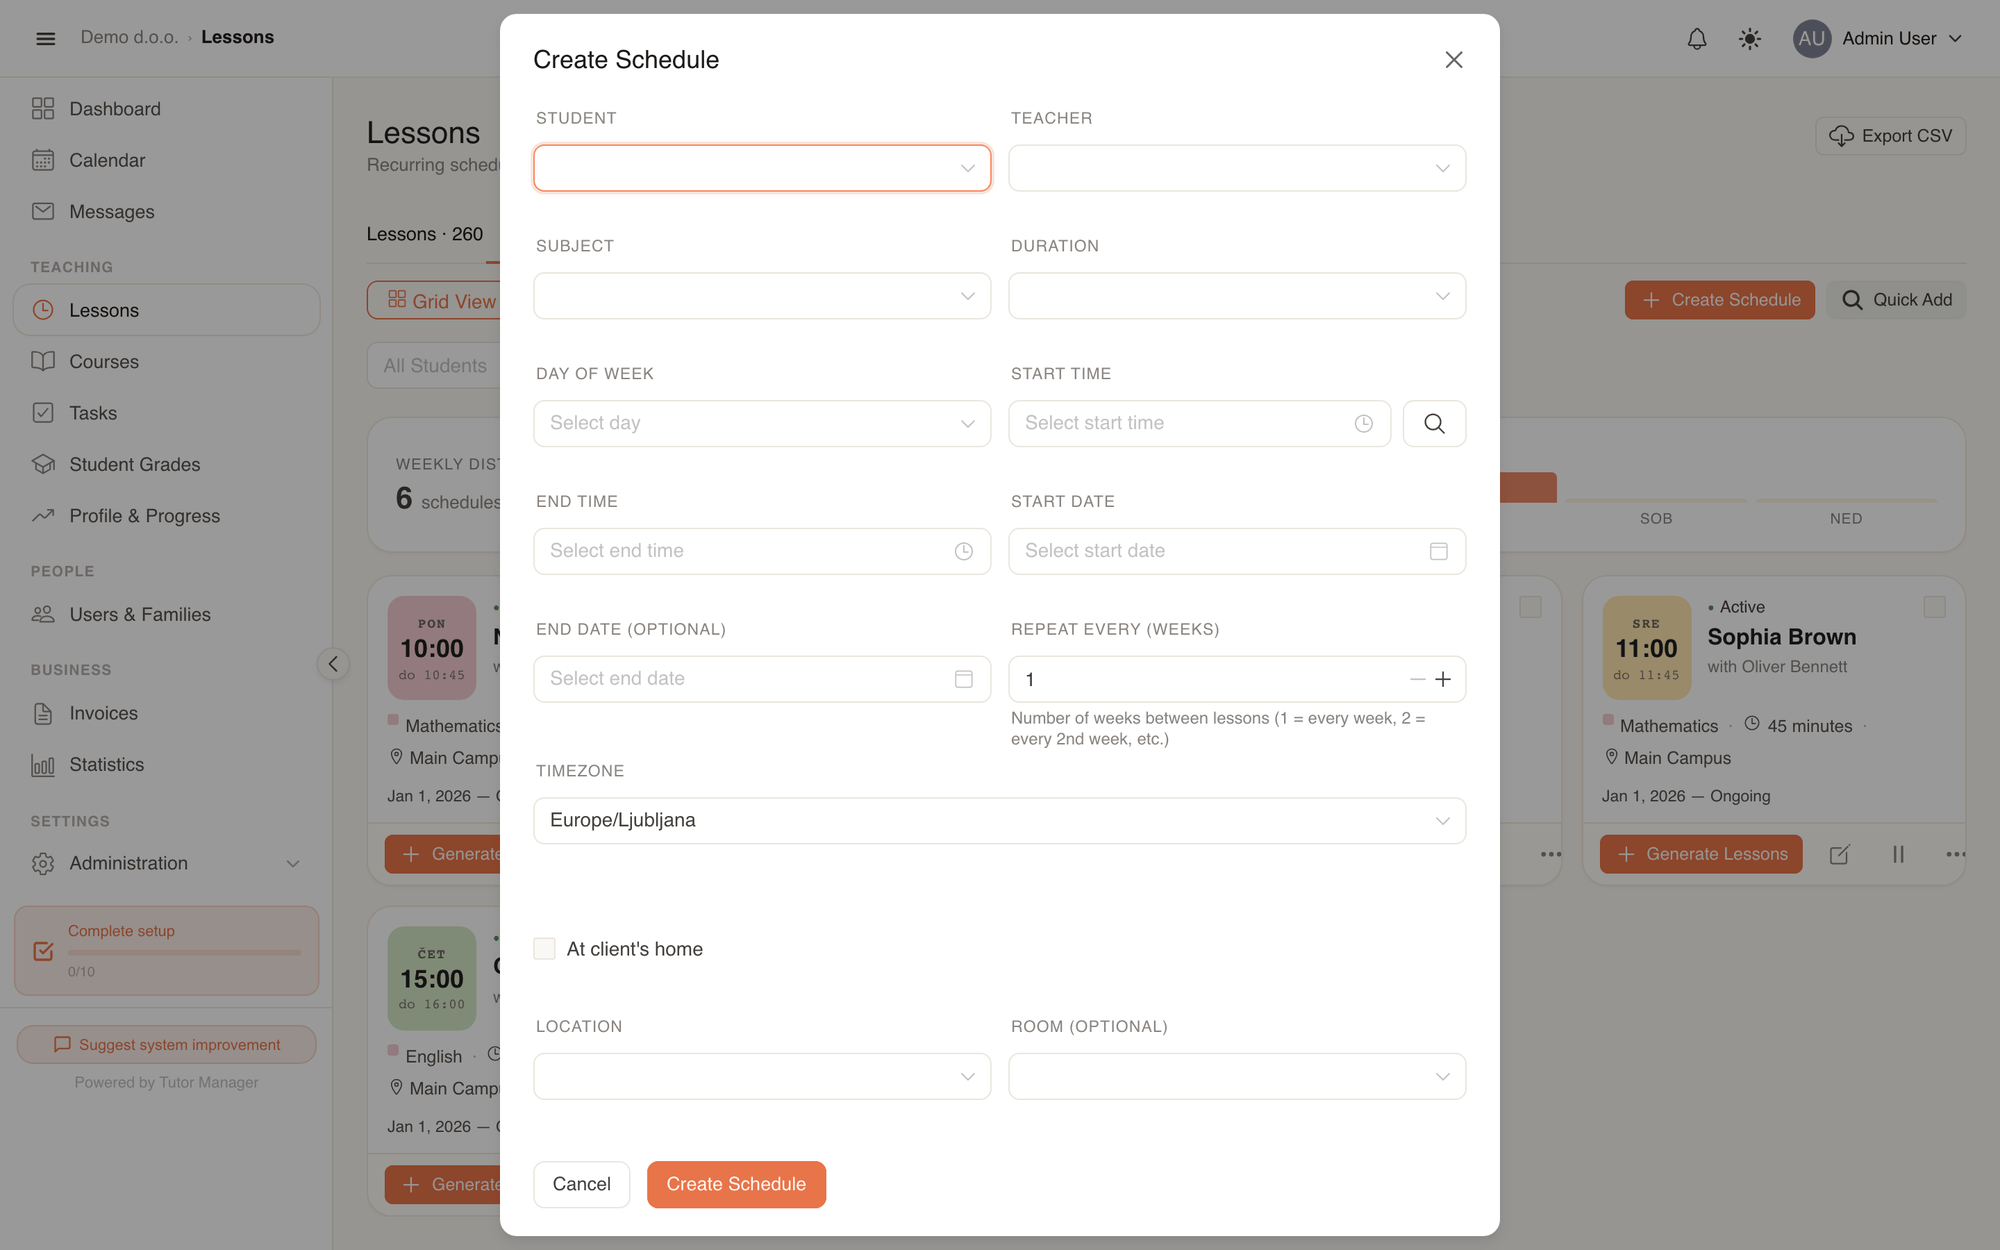
- Open the Schedules tab and click Create Schedule.
- Choose the Student, Teacher, Subject and Duration.
- Set the Day of week and Start time.
- Set Repeat every (weeks):
1for every week,2for every second week, and so on. - Set the Start date and, if the lessons stop at a known date, the End date (optional).
- Choose the location (or tick At client's home) and click Create Schedule.
Generate lessons from schedules
A schedule by itself does not put lessons in the calendar — you decide for which period lessons are created.
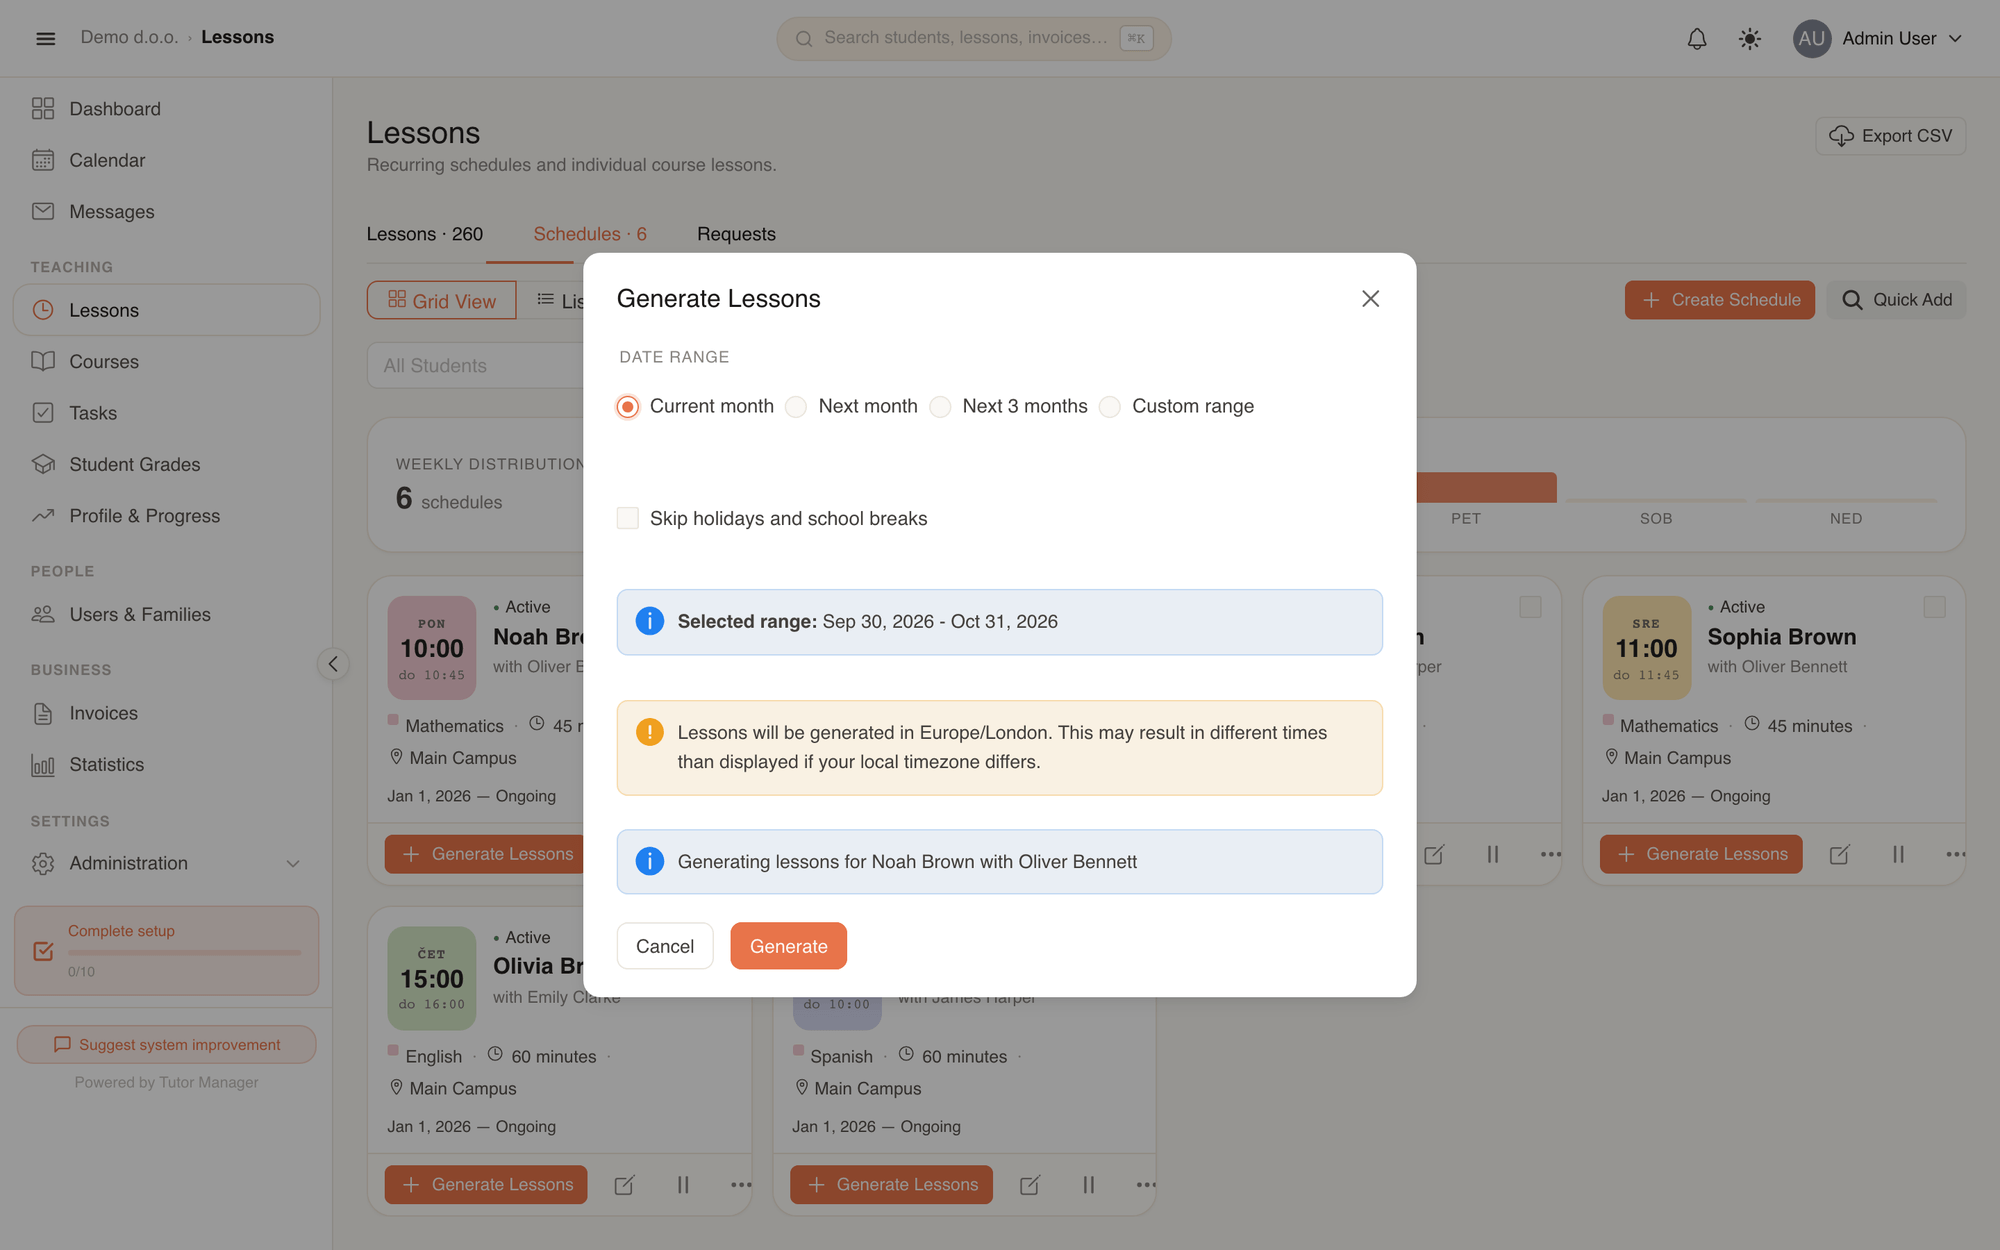
- On the Schedules tab click Generate Lessons on a schedule — or select several schedules and click Generate Selected.
- Pick a period: Current month, Next month, Next 3 months or Custom range.
- Switch on Skip holidays and school breaks (recommended) and click Generate. The lessons appear on the Lessons tab and in the calendar.
Holidays
With Skip holidays and school breaks switched on, no lessons are created on public holidays or school breaks — see Holidays.
Pause or end a schedule
Use Pause when a student takes a break (for example over the summer) and Resume when they come back. A schedule's status shows whether it is Active, Upcoming, Paused, Expired or Completed.
Lesson statuses
| Status | Meaning |
|---|---|
| Scheduled | Planned, not held yet |
| Completed | Held — attendance recorded |
| Cancelled | Will not take place |
| Rescheduled | Moved to another time |
| No Show | The student did not attend without cancelling |
To mark a lesson as held, see Completing a lesson.
Edit, cancel or delete a lesson
Open a lesson from the list to see its details, files and homework.
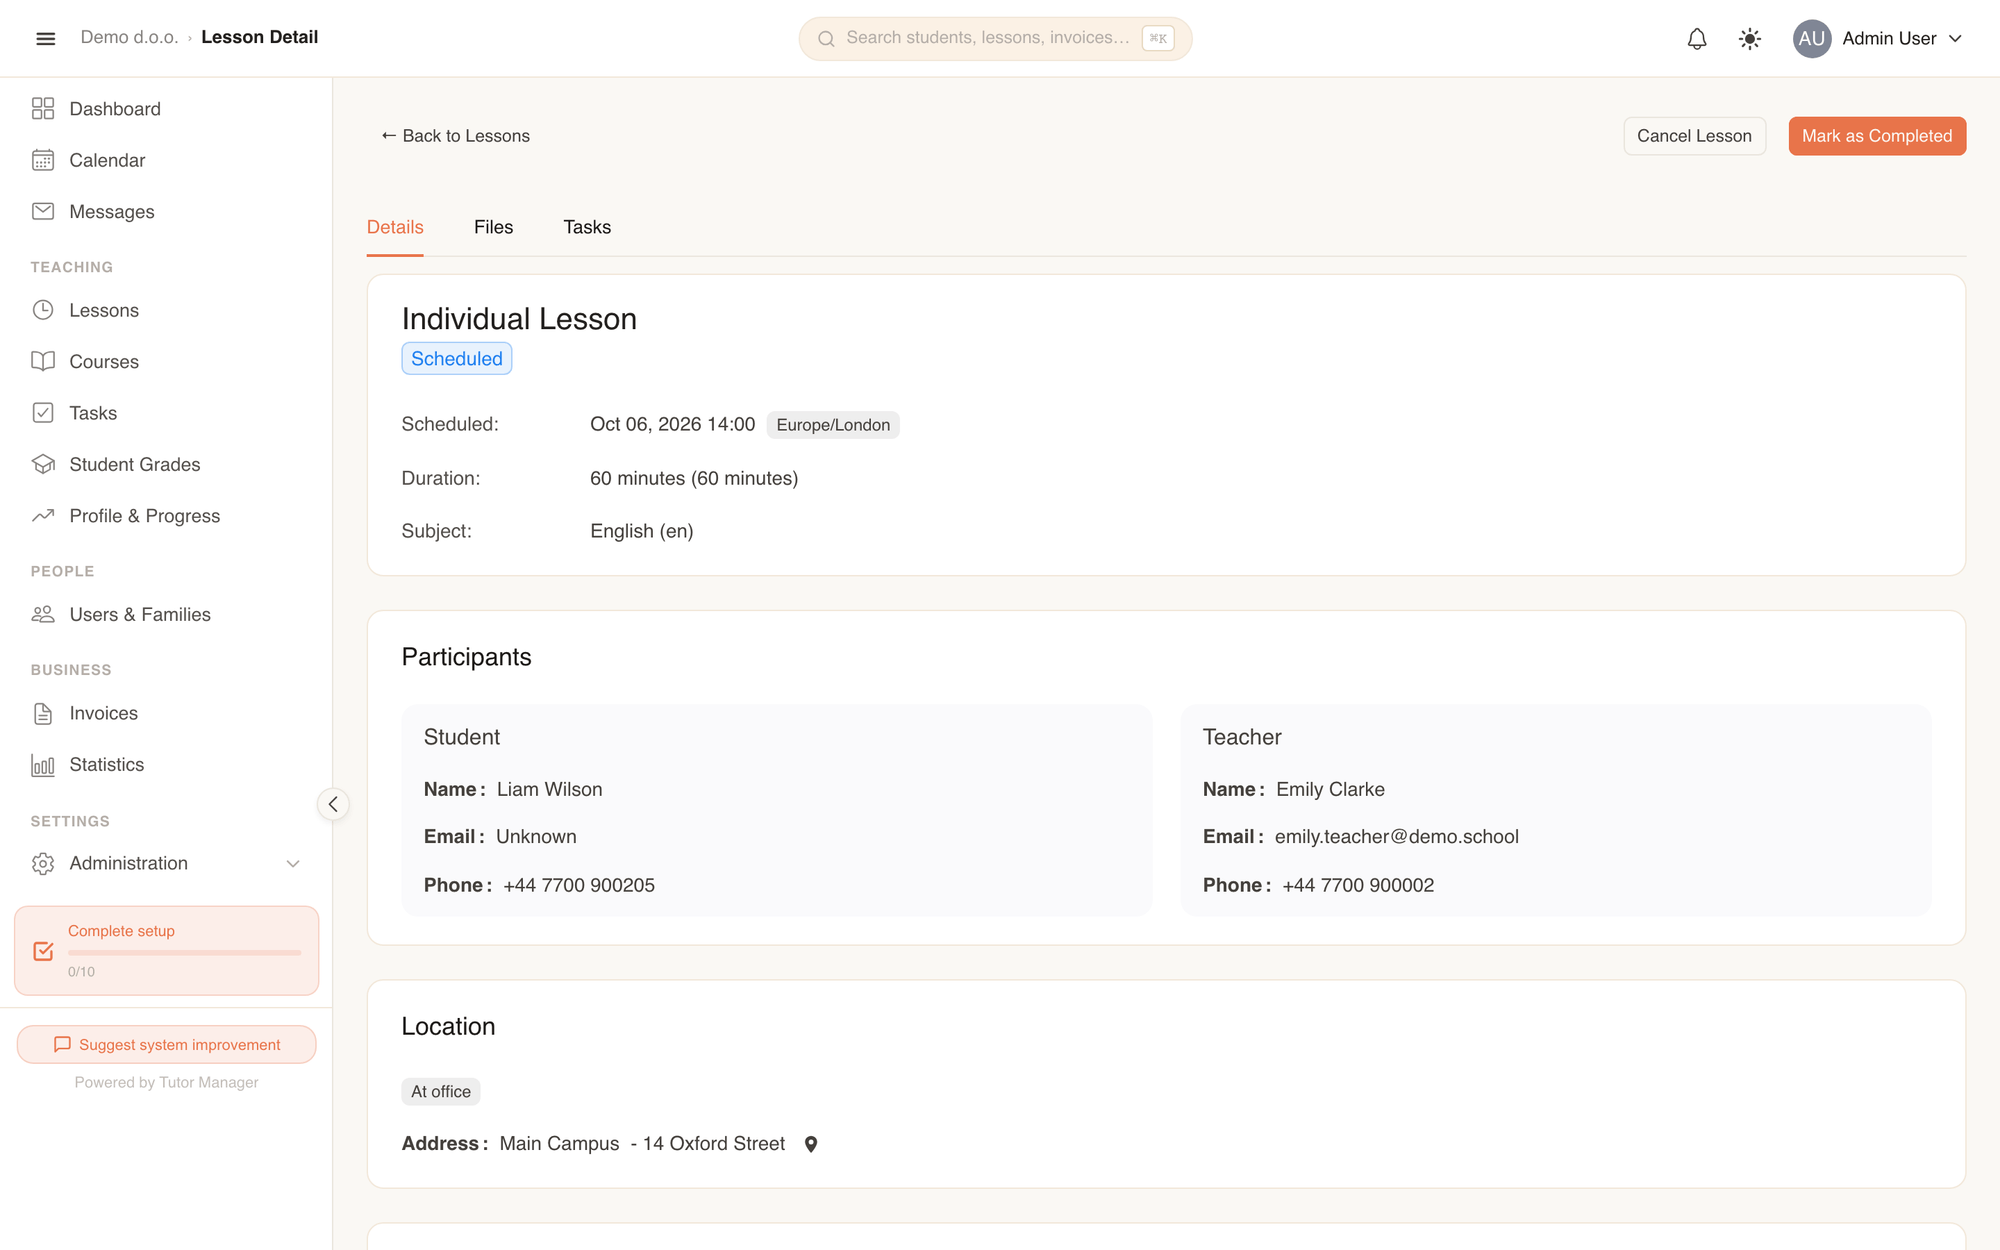
- Edit (in the row menu) — change the time, teacher, location, notes …
- Cancel Lesson (on the detail page) — the lesson stays in the history with the status Cancelled.
- Delete — removes the lesson completely. Only Scheduled and Cancelled lessons can be deleted; completed lessons stay for attendance and invoicing. To delete several lessons at once, tick them in the list and click Delete.