
Calendar
The Calendar gives you a clear visual overview of all individual lessons, course sessions, and room bookings across your school. You can switch between week, month, and day views, filter the schedule by teacher, student, location, or room, and sync everything with your personal calendar app.
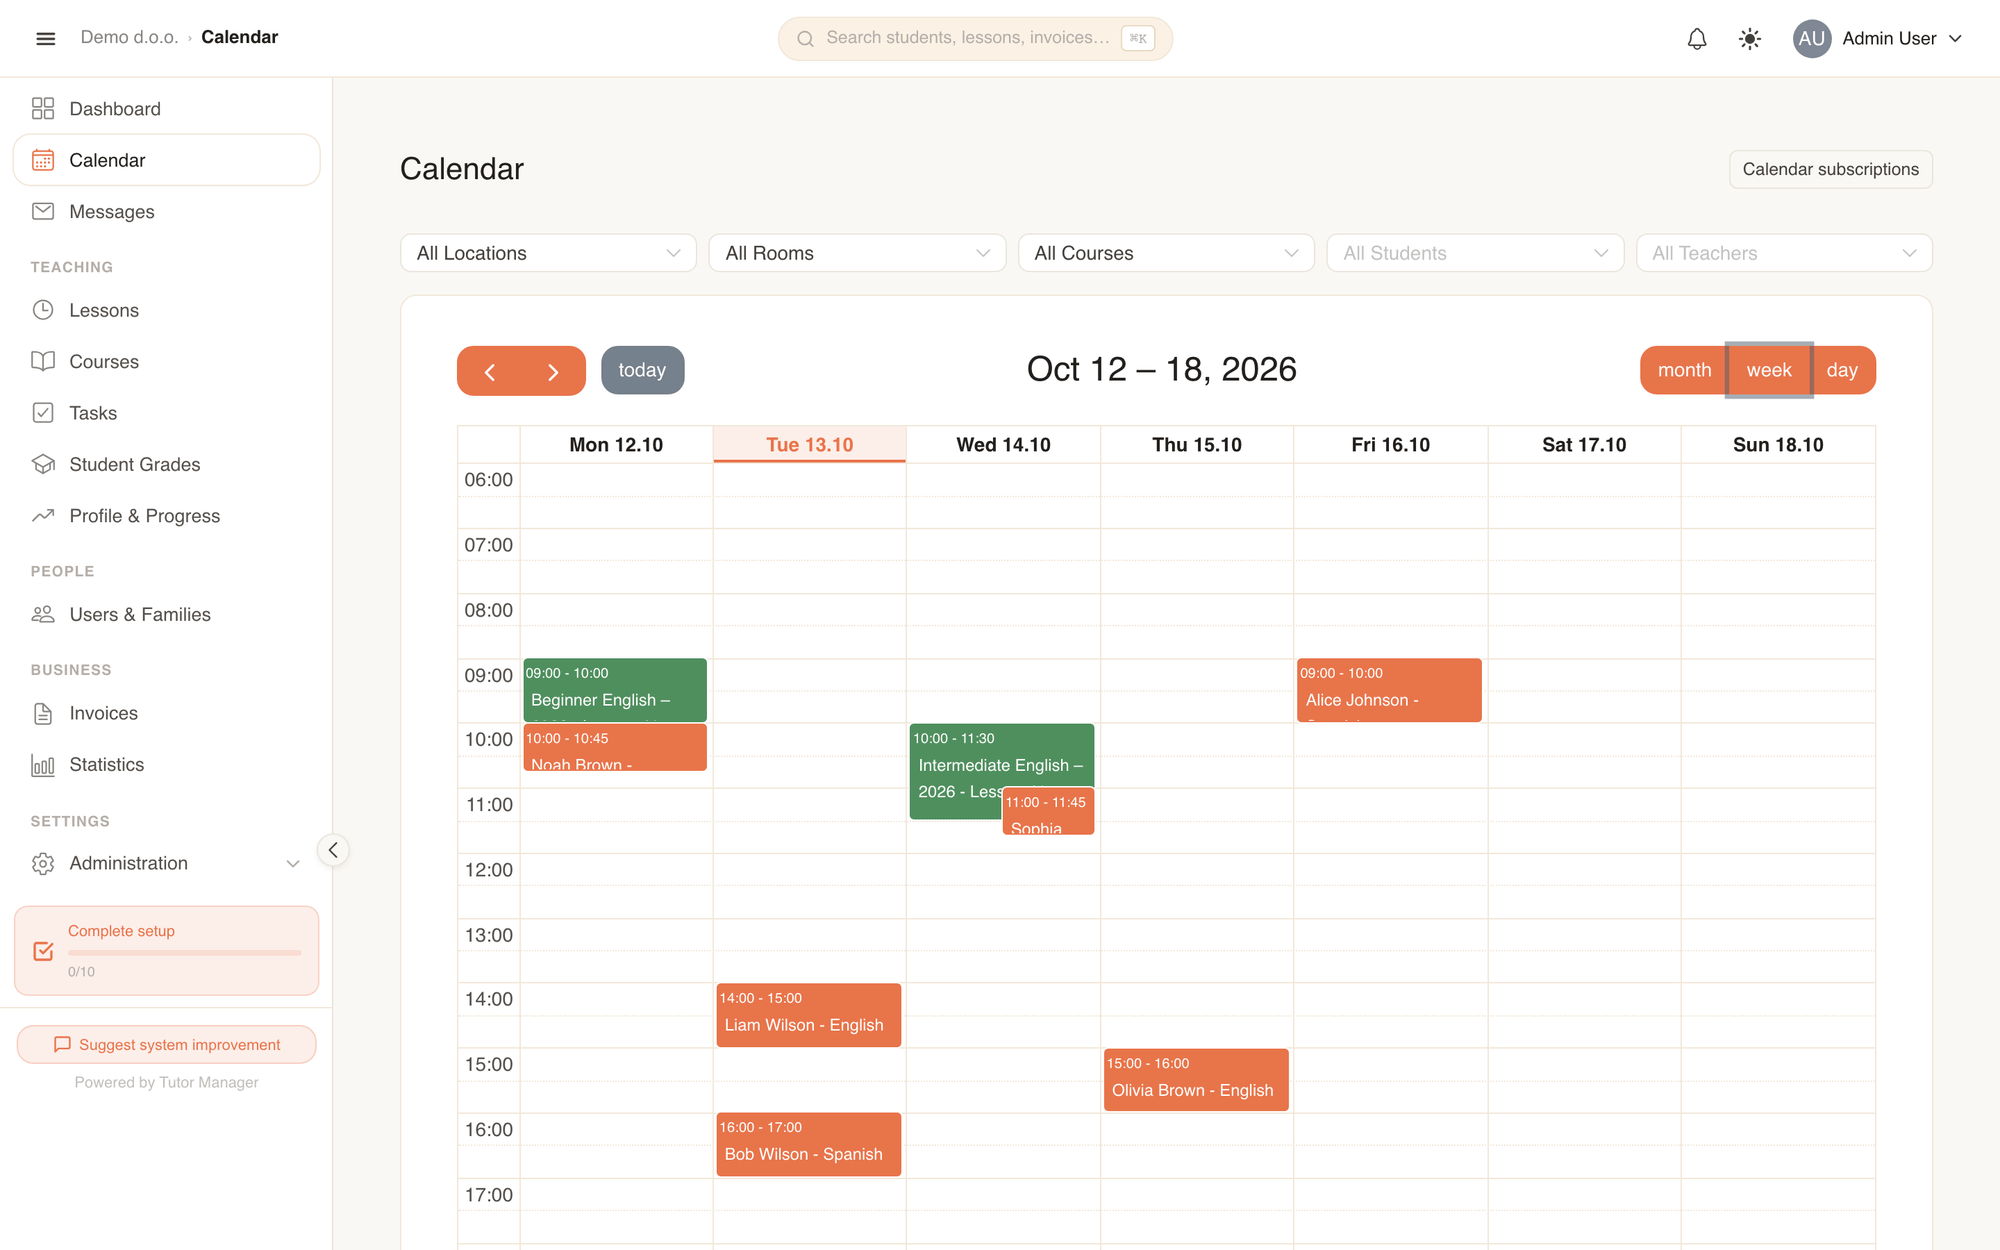
Calendar views
TutorManager offers three views accessible from the top-right corner of the calendar:
| View | Best for |
|---|---|
| Week | Managing weekly schedules, spotting open time slots, and checking teacher availability |
| Month | Long-term planning, holiday scheduling, and seeing course start dates |
| Day | Managing daily room utilization and hour-by-hour classroom traffic |
Use the < and > buttons in the top left to move backward and forward, or click Today to return to the current date. The calendar persists your selected view and date in the URL, so reloading the page or bookmarking it keeps your place.
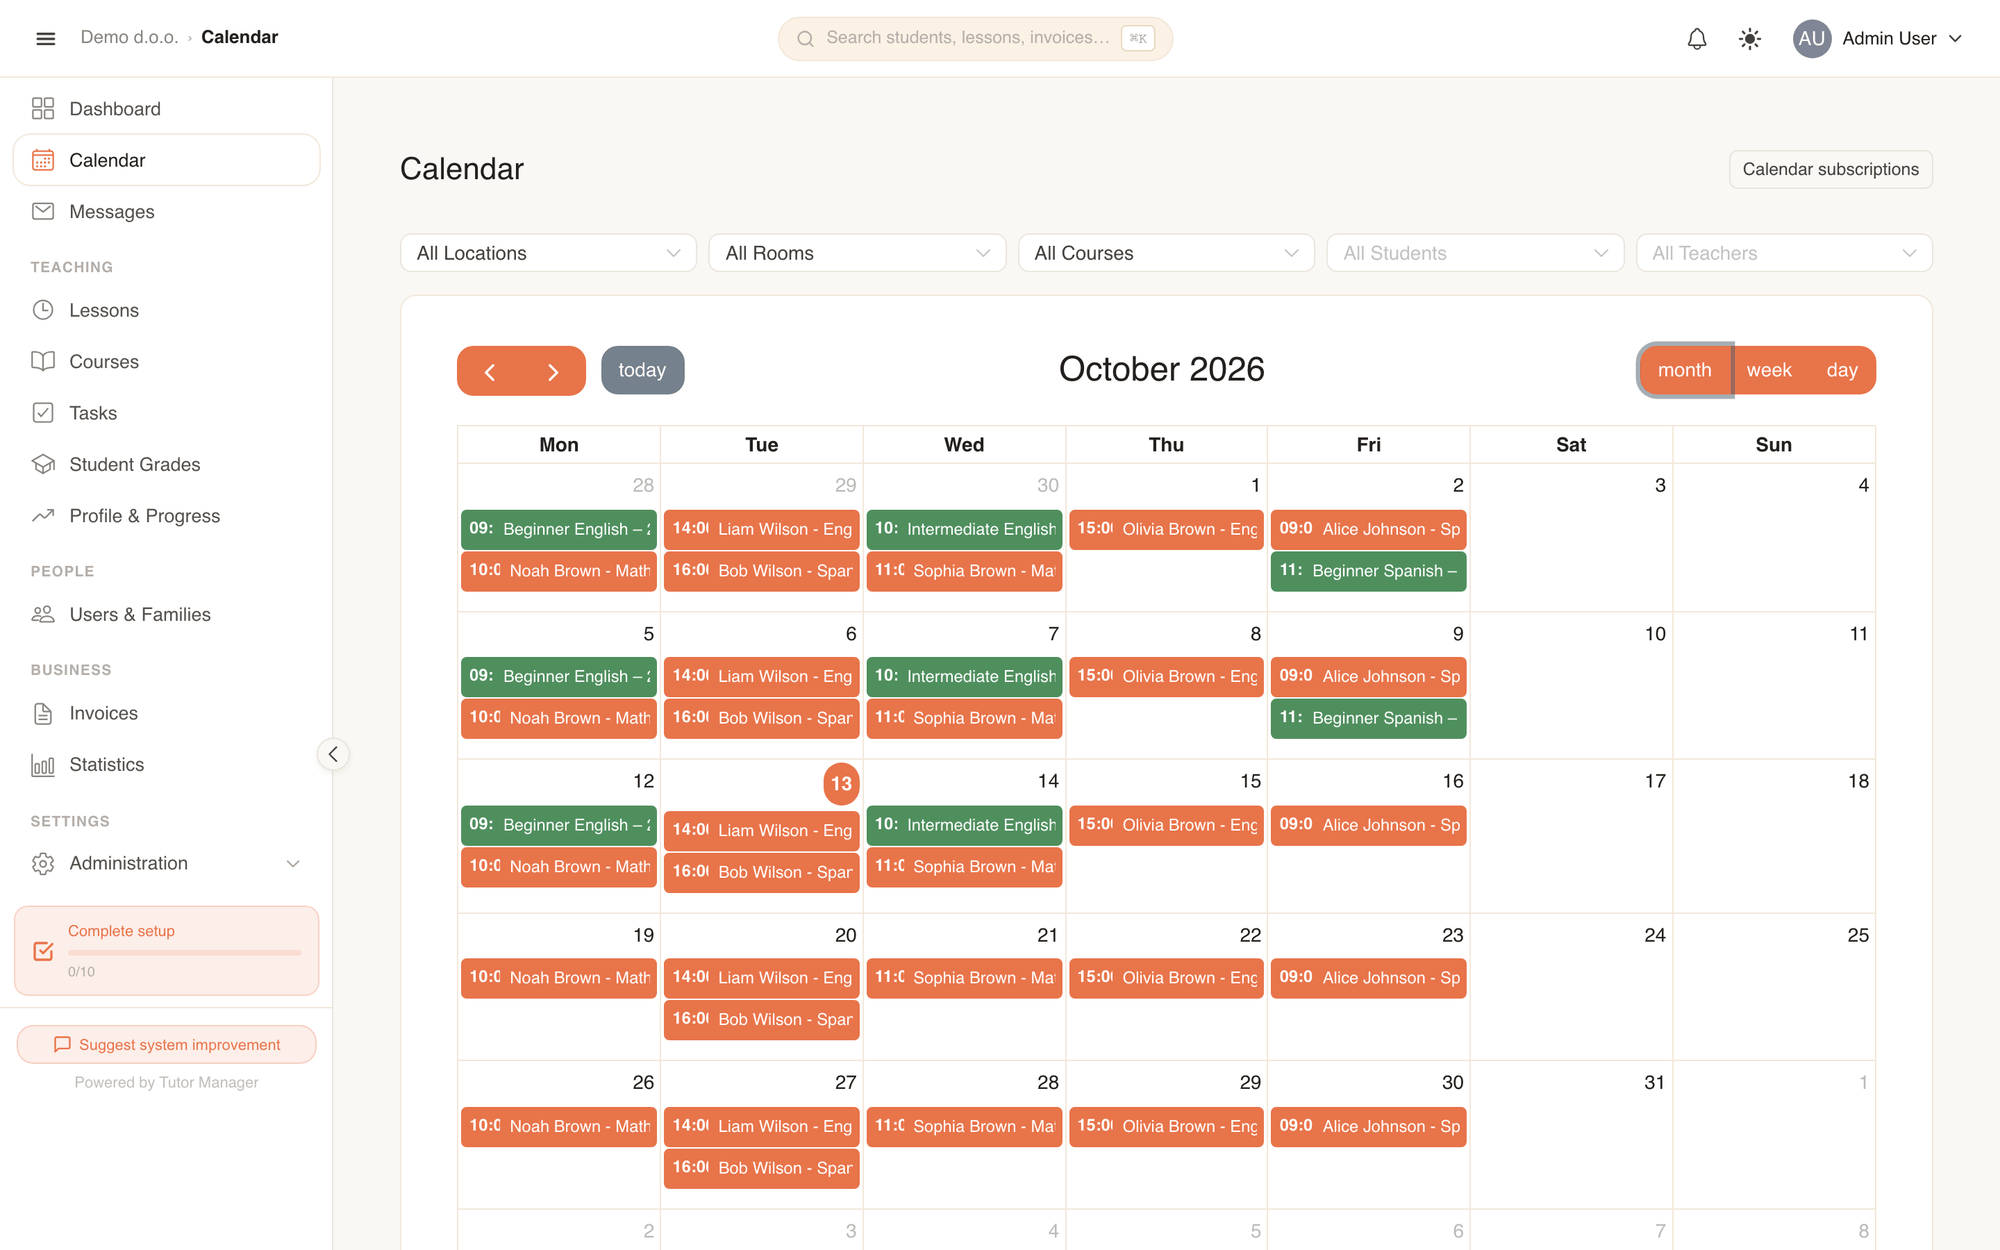
Filter the calendar
Staff members (admins, receptionists, and teachers) can use the filter bar above the calendar to focus on specific people or facilities:
| Filter | Description |
|---|---|
| Select location | Show lessons scheduled at a specific school branch. |
| Select room | Filter by a specific room within the selected location. |
| Select subject | View lessons for a specific course or subject. |
| All Students | Filter by one or more specific students (multi-select). |
| All Teachers | Filter by one or more teachers (multi-select). |
Student & parent view
Students and parents do not see the filter bar. Students only see their own lessons and enrolled courses, while parents see the combined schedules of all children in their family.
Event colors
Events on the calendar are color-coded so you can distinguish them at a glance:
- Individual lessons: Displayed in the student's assigned color (configured in their profile), or the system default.
- Course lessons: Displayed in the distinctive Color set in the course settings. This makes it easy to separate group classes from one-on-one sessions.
Create or edit a lesson from the calendar
Staff members can add lessons directly from the calendar without opening the lessons list first.
Schedule a new lesson
- In the Week or Day view, click on the desired free time slot.
- The Create Lesson modal opens with the Date & Time already filled in.
- Select the Student, Teacher, Subject, and Duration.
- Choose whether the lesson takes place at school (select Location and Room) or tick Lesson at client home (enter the address and distance).
- Click Create Lesson. The new session appears instantly on the calendar grid.
View and edit lesson details
Click any event on the calendar to open its details:
- Individual lessons: Shows the student, teacher, subject, scheduled time, duration, location/room, status, and notes. Click Edit to modify details or update the lesson status.
- Course lessons: Shows the course name, lesson number, date, room, and status. Click View Course to jump directly to the course management page.
Calendar subscriptions (iCal sync)
You can sync your TutorManager schedule with Google Calendar, Apple Calendar, Outlook, or any calendar app that supports iCal feeds.
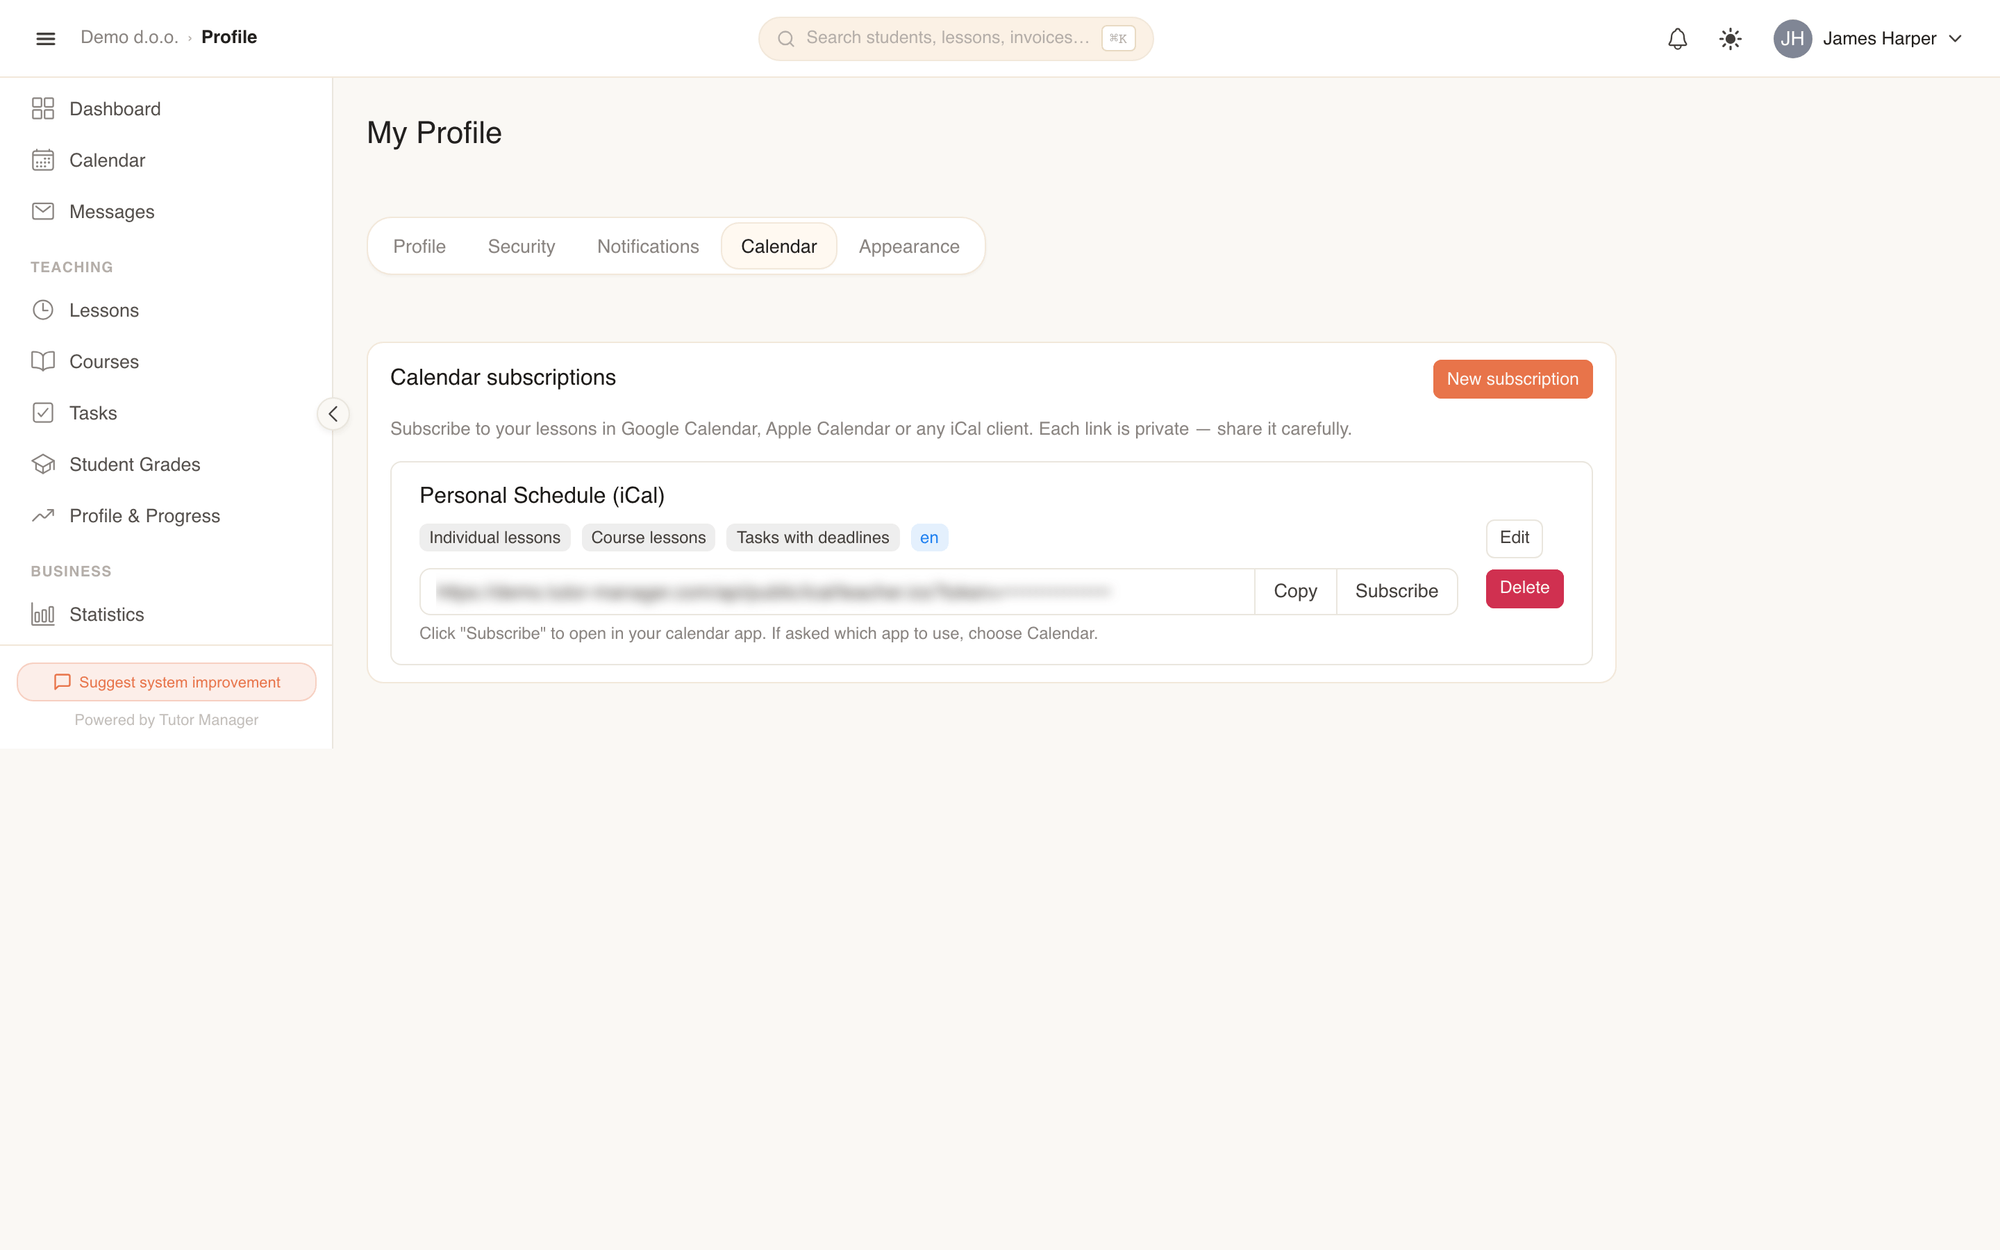
Create a calendar subscription
- Click Calendar subscriptions in the header of the Calendar page (or navigate to Profile and open the Calendar tab).
- Click New subscription.
- Enter a descriptive Name (such as "Work Calendar" or "Teaching Schedule").
- Under Include in calendar, choose what to include:
- Individual lessons
- Course lessons
- Tasks with deadlines (homework due dates)
- Optionally enable Enable travel time advisory (notifies Apple Calendar users when to depart for in-home lessons).
- Under Show in calendar, choose whether to Hide completed events or Hide cancelled events.
- Select a Language override if desired, then click Save.
Connect to Apple Calendar
Click Subscribe next to your subscription link. Your browser will prompt you to open the link with your calendar application. Confirm the subscription in Apple Calendar and choose your preferred refresh frequency (e.g. Every hour).
Alternatively, copy the URL, open Apple Calendar, select File → New Calendar Subscription, paste the URL, and click Subscribe.
Connect to Google Calendar
- In TutorManager, copy the subscription URL using the Copy button.
- Open Google Calendar in your browser.
- On the left sidebar, find Other calendars and click the + (plus) icon.
- Select From URL.
- Paste the copied URL and click Add calendar.
Private link
Each calendar subscription URL contains a secret security token that grants access to your personal schedule without a password. Keep this link private and never share it publicly. If a link is compromised, delete the subscription and create a new one.